


Fair use says OK to upload. Maybe even include the source to help other learn?
-
If you like what you see here at Trainsim.com, be it the discussions and knowledge in the forums, or items available in our library, I hope you'll consider a paid membership to help support keeping the site operating.... Thanks! -
Thanks Parker - yeah - amazing what some new parts and an HD texture can do.
Thanks Fred - yeah - I know steam is pretty neglected around here - but I knew there had to be some.
Me too Pete - stuff like this would be a great model for a beginner - you could follow along with any Blender tutorial and just make a simple railroad model instead. I wouldn't recommend doing what I did - with my very first model being a steam locomotive - that was simply masochistic.
Regards,
ScottLast edited by scottb613; 09-22-2026, 19:15.Comment
-
Comment
-
My PDF Blender Content Creation Notebook specifically says... "Don't do it. Start small." and... "Let's make a Cement Jersey Barrier"I wouldn't recommend doing what I did - with my very first model being a steam locomotive - that was simply masochistic.http://www.railsimstuff.com
Just Blender now, 3DCrafter only when I have to.
Formerly The Keystone Works (All Permissions Granted)
Things I work on: https://github.com/pwillard
Comment
-
Now THAT is some sage advice...

My sad little Prairie from 2004/2005 - how I struggled with it...
Prar23.jpg
Regards,
Scott
Comment
-
Hi Folks,
After I placed the water tower on a route - way too short - the spout plowed through the side of my tender. Had to make the tank and nozzle 4 feet higher and redo all the animations (spout, pulleys, wire, counterweights). Consulting historical data - it seemed odd to have a hole for a hatch in the side of a tank - they typically used roof hatches - so that's gone. Then the old wooden ladder was no longer feasible for that height - had to use steel.
I also found TSRE GenX was not snapping interactives associated shapes - properly to the track - so I fixed that as well.
REBUILT:
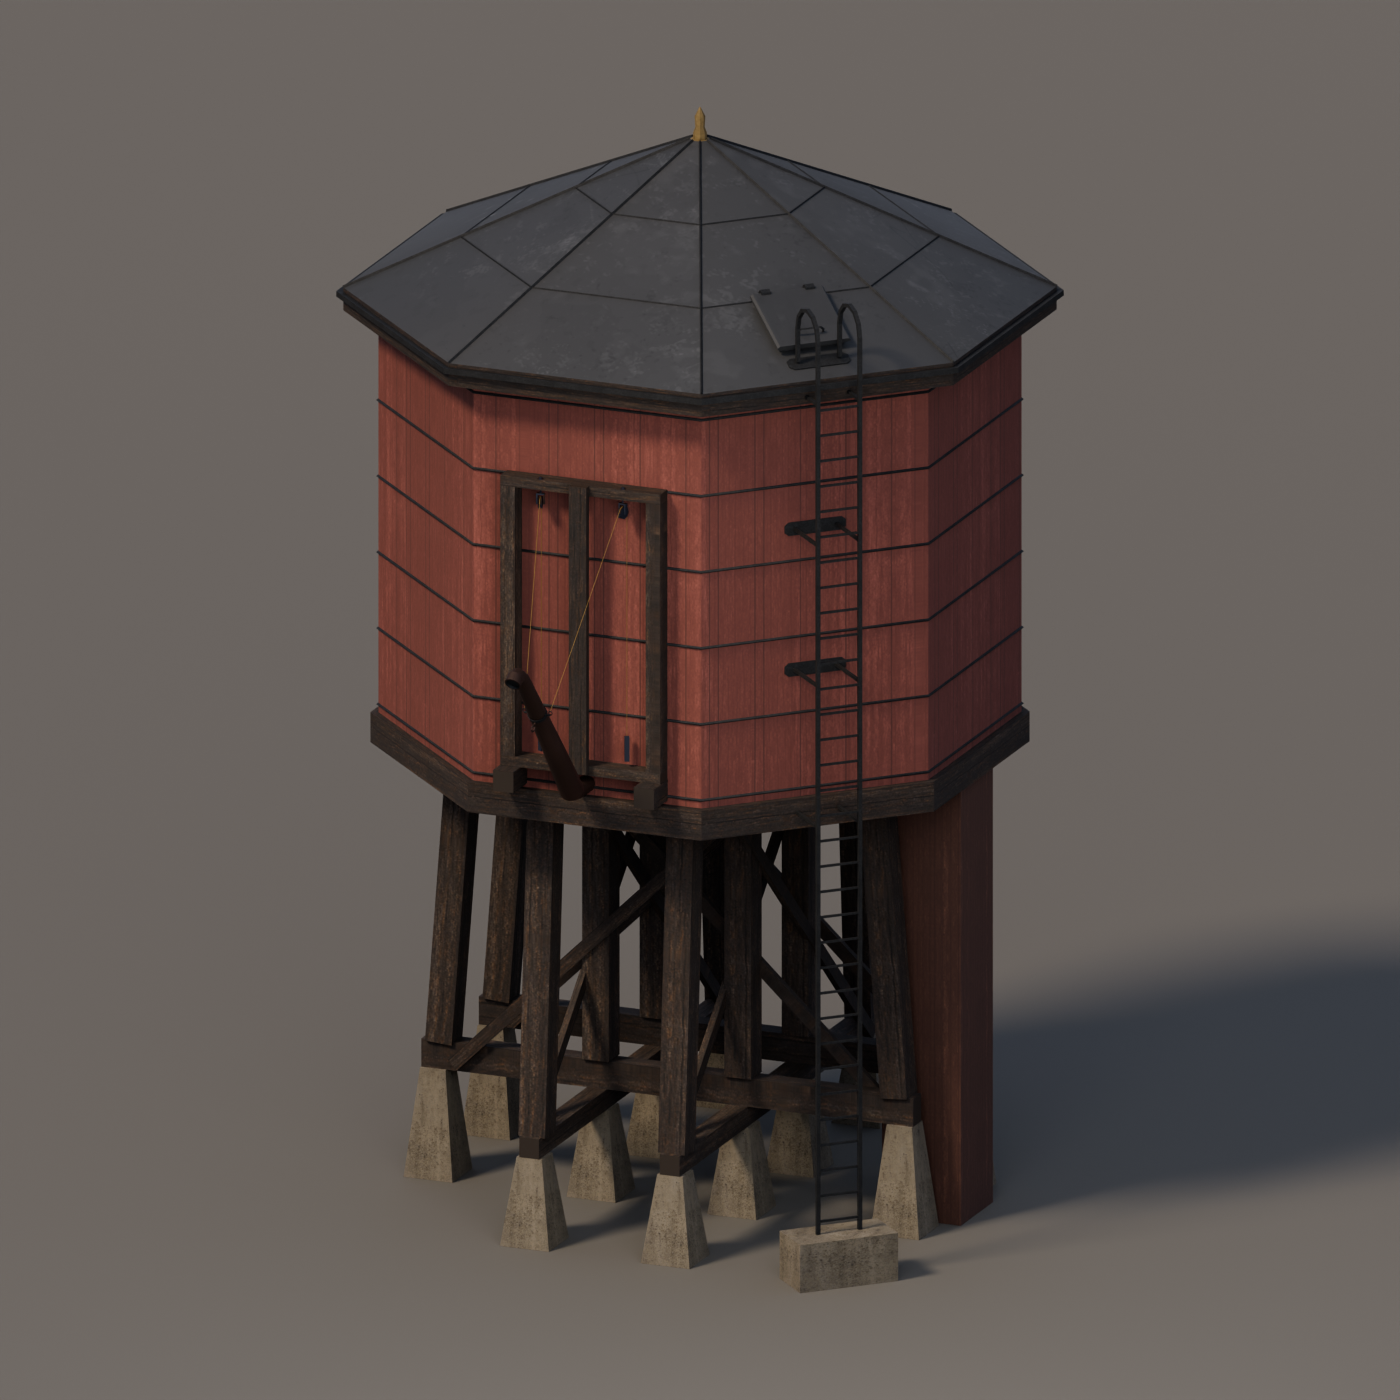
Regards,
ScottLast edited by scottb613; 09-25-2026, 09:38.Comment
-
Hi Folks,
OK - the two open top coal slides - only one animated - bothered me - did a little more research - and revised the model - new roof textures and a single animated closed top slide with animated wire, pulleys, and counterweights - to match the water tower.
REVISED:

Regards,
ScottLast edited by scottb613; 09-25-2026, 09:25.Comment
-
I know I sound like I'm begging... but it would be really nice to explain to other people how to get animations working. People keep asking me to add it to my notebook, but I don't know enough about it to oblige.http://www.railsimstuff.com
Just Blender now, 3DCrafter only when I have to.
Formerly The Keystone Works (All Permissions Granted)
Things I work on: https://github.com/pwillard
Comment
-
Hi Pete,
Think of the old clay stop-motion movies (The Golden Voyage of Sinbad was a favorite as a kid) —pose the figure, take a picture, move it a little, take another picture. Play those pictures in sequence and you have motion.
Same basic idea in Blender, except I don’t have to manually pose every frame. Put the chute in its raised position at frame 0 and save its rotation as a keyframe. Move to frame 60, rotate it into its lowered position, and save another keyframe. Blender fills in the movement between those positions. Scrub the timeline and you can watch it operate.
Build a few sets of running gear for a steam locomotive - usually about 40 hours work for me - and you get the idea real quick.
The modeling setup is important. The chute’s pivot needs to be at its hinge, the pulleys rotate around their axles, and the counterweights move vertically. Those moving pieces stay separate objects. I can also control whether the movement runs at a steady speed or eases into a stop.
For my tower, I use one animated control to coordinate the mechanism—0 means raised, 1 means lowered. Some simple mathematical relationships, called drivers, tell the other parts what to do as that value changes. The chute rotates through its operating angle, and its cable attachment travels in an arc around the hinge.
The rope is treated as a fixed length. As the section between the chute and pulley gets longer, the section hanging down to the counterweight gets shorter, so the weight rises. Pulley rotation follows the amount of cable travel—one pulley revolution corresponds to one circumference of cable passing over it. That saves me from positioning everything independently and trying to keep it connected by eye.
Back to the clay animation analogy: if a character pulls a rope, you have to move whatever is attached to the other end before taking the next picture. The drivers do that housekeeping for us.
When I export, those calculated movements become ordinary position and rotation keyframes that Open Rails plays. The simulator isn’t figuring out gravity or solving the machinery — I’ve already worked out the motion in Blender.
Regards,
ScottComment
-
Definitely an area I have not explored that I need to. Thanks.http://www.railsimstuff.com
Just Blender now, 3DCrafter only when I have to.
Formerly The Keystone Works (All Permissions Granted)
Things I work on: https://github.com/pwillard
Comment


Comment