-
Cheers!
Pete
-
Motto: Loneliness stands by with me and my own isolation.
Comment
-
Testing the waters now... I did follow the instructions from Ossie's post and this is what I have so far, I copy the texture map A from the ATSF SD45u and paste them into the DRGW SD45's texture map A, although I did retain the wheel texture, next thing I need to figure out is the prim states...
Screenshot 2024-12-25 222254.pngMotto: Loneliness stands by with me and my own isolation.
Comment
-
SV_ATSF_SD45u_1.png SV_ATSF_SD45u_2.png
Sorted out the Prim States and here's the results, it looks good but there were some discrepancies such as a small spacing between the body and the truck, the truck from the DRGW SD45 shape having less width than the trucks from the ATSF SD45u shape (using the BN SD45 as a base).Last edited by Whatever2006; 12-25-2024, 12:43.Motto: Loneliness stands by with me and my own isolation.
Comment
-
More progress on my end as I use SFM to shift both the main body shape and the FA shape to close up the small space between them and the trucks.
Screenshot 2024-12-26 040840.png
Something about a lot of effort being wasted into something that's pointless if that's what I'm percepting, although I think I both agree and disagree with you somewhat on your view on swapping out the trucks on a locomotive.
Edit: I decide to revert the body back into it's original position and reposition the trucks instead... although I'm unsure of what to do with the sizing of the trucks for the time being but my small update on ATSF 5313 will do.Last edited by Whatever2006; 12-25-2024, 15:09.Motto: Loneliness stands by with me and my own isolation.
Comment
-
If it's what you want to do, go for it. That's all part of the fun of this hobby, but I agree it seems a lot of work for a small gain.Geary "Mr. Hart" Gerhardt - Owner and CEO of Hart Rail Lines, Hart Commuter Railways, and Hart Rail Cars. Also the defunct Hart Electric Transit.
Its Your Train Sim World, sim as you please.Comment
-
Test video of the truck modification in progress... I notice some issues with the wheel animation not being centered when the loco moves, not sure I will sort that out...Last edited by Whatever2006; 12-25-2024, 15:55.Motto: Loneliness stands by with me and my own isolation.
Comment
-
Egg-shaped wheels were a common outcome when editing the dimensions of shapes in SFM when you did not do height/length adjustments in proportion.
Probably the best looking set of wheels an MSTS-grade carbody with the square box rear headlight casing could ever have.
I ask the Community Harmony Caucus a sincere question: Is there really much of an advantage to OR grade trucks on an MSTS grade carbody? Especially if it enables the revival of so many repaints in the library that are the product of untold iterations of image compression of textures that may tally a half dozen times? (textures compressed by Tony the original creator, compressed again when Bob made the blanks, compressed again when Steve made the repaint, compressed again when Tom made the renumber pack, compressed again when Bill adopted his tweak of the textures to an upgraded round-wheel shape, etc). Sorry, that should be too much compression for anyone's tolerance level.
My Open Rails videos https://www.youtube.com/@lakecities3663/videosComment
-
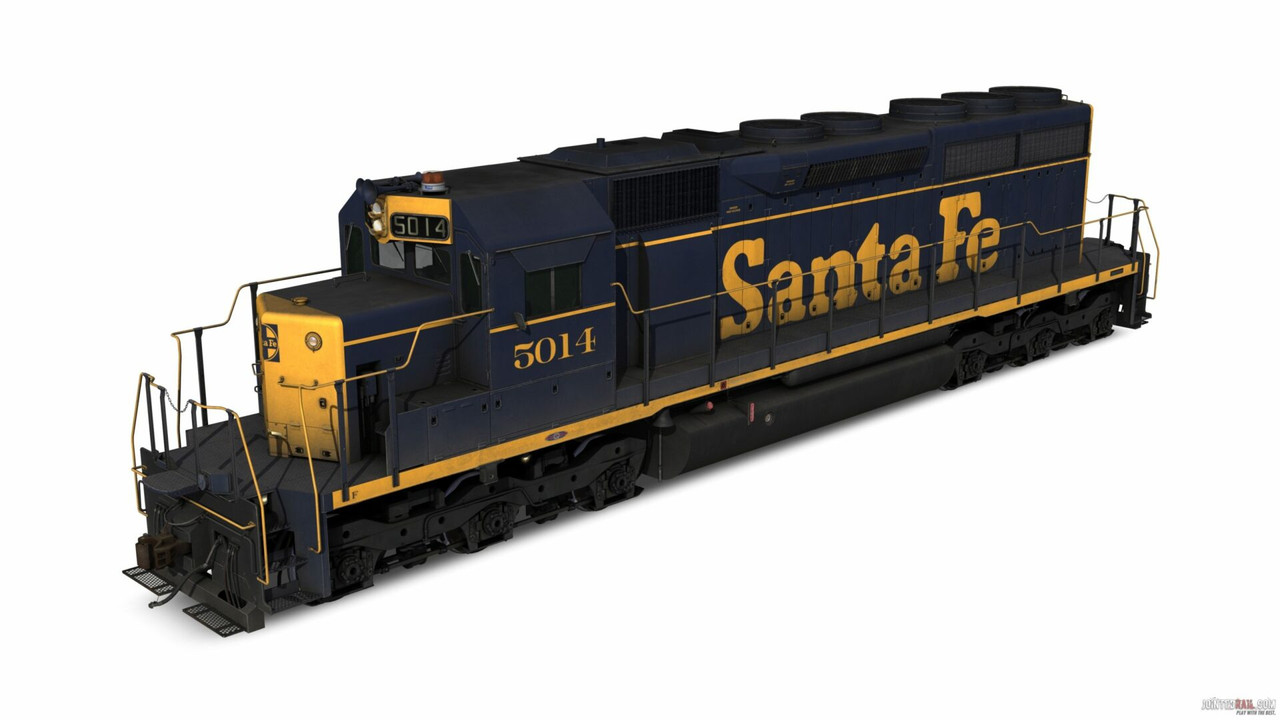
Also, you have to be aware of the location of the parking brake. While the TS SD45 batch of numbers are all correct (all had a long hood brakewheel), some ATSF SD45 orders (including the one 5313 came from) had the ratchet handbrake on the short hood.
The recent SD40 pack had an incorrect position for the ATSF group. Should have had a short hood ratchet handbrake, too, and not the stand-mounted wheel ones at the end of the long hood. The yellowbonnet BNSF ones were correct, tho. JointedRail had it in the right spot, too. You might get away with using the BNSF shape with the yellowbonet ATSF textures if you are okay with the nose headlight and a roof A/C, but there is no alternate shape solution for the solid blue one as that scheme pre-dated the nose headlight.
 My Open Rails videos https://www.youtube.com/@lakecities3663/videos
Comment
-
I might need to take a look at the trucks from the DRGW SD45 shape to see what went wrong after shifting the position of it later on...
Assuming if I got the SD40 set and did a lot of tinkering with the textures and shape files, it might be a lot of effort for something small but who knows...Last edited by Whatever2006; 12-26-2024, 00:43.Motto: Loneliness stands by with me and my own isolation.
Comment
-
I find the multiple layers of compression artefacts add a degree of depth and 'weathering' to the textures that make most of them look better than what I can do. :-)
Comment
-
I'm not sure I'm going to do this... however, as long I have the time, motivation and patience to do this then, I can finally get my small gain for my idea on experimenting something I never thought of doing, for now I will put that idea away for the time being but I might come back to idea and post what I'm doing so far and see what kinds of findings I see from my perspective.
Screenshot 2024-12-26 171537.pngMotto: Loneliness stands by with me and my own isolation.
Comment


Comment